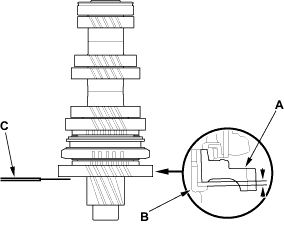
- Measure the clearance between the 1st gear (A) and the distance collar (B) with a feeler gauge (C). If the clearance is more than the service limit, go to step 2.
Standard:
0.06 - 0.16 mm (0.002 - 0.006 in.)
Service Limit:
0.25 mm (0.010 in.)

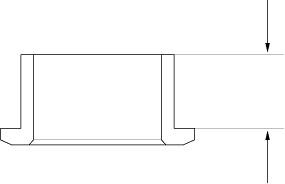
- Measure the thickness of the distance collar.
- If the thickness is less than the standard, replace the distance collar with a new one.
- If the thickness is within the standard, go to step 3.
Standard:
23.03 - 23.08 mm (0.907 - 0.909 in.)

![]()
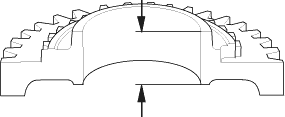
- Measure the thickness of the 1st gear.
- If the thickness of 1st gear is less than the service limit, replace 1st gear with a new one.
- If the thickness of 1st gear is within the service limit, replace the 1st/2nd synchro hub with a new one.
Standard:
22.92 - 22.97 mm (0.902 - 0.904 in.)
Service Limit:
22.87 mm (0.900 in.)

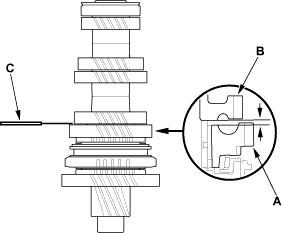
- Measure the clearance between the 2nd gear (A) and 3rd gear (B) with a feeler gauge (C). If the clearance is more than the service limit, go to step 5.
Standard:
0.06 - 0.16 mm (0.002 - 0.006 in.)
Service Limit:
0.25 mm (0.010 in.)
