- Remove the ash tray, then remove the center console lower cover.
- Remove the shift lever console panel.
- Shift the lever to
 position.
 - Slide the lock tab (A) down on the shift cable end holder (B).

- Remove the shift cable lock (C) holding its middle (D) with needle-nose pliers (E) from the shift cable end and shift cable end holder.
NOTE: Do not pry the shift lock with a screwdriver, it may damage the shift cable end holder.
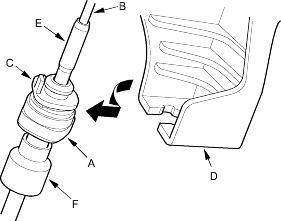
- Rotate the socket holder (A) on the shift cable (B) counterclockwise a quarter turn; the projection (C) on the socket holder faces direction to remove. Then slide the holder to remove the shift cable from the shift cable bracket base (D).
NOTE: Do not remove the shift cable by twisting the shift cable guide (E) and damper (F).

- Push down the shift cable until it stops, then release it. Pull the shift cable back one step so that the shift cable is in


- Turn the ignition switch ON (II) and verify that the
 position indicator light comes on.
 - Turn the ignition switch OFF.
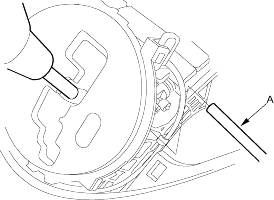
- Insert a 6.0 mm (0.24 in.) pin (A) in to the positioning hole on the shift lever bracket base through the positioning hole on the shift lever assembly. The shift lever is secured in
 position.


